
Position Sizing Mastery: Protect Your Capital and Scale Profits (2026)
Master position sizing formulas that protect your capital and maximize gains. Learn the 1% rule, Kelly Criterion, volatility-based sizing, and how to calculate perfect position sizes for every trade.
Position Sizing Mastery: The 1% Fortress Protocol (2026)
Introduction: The Only Variable You Control
At Smart Trades Zone, we treat position sizing as a survival mechanism. If you size too small, you waste your time; if you size too big, you will eventually blow up. This playbook outlines the "1% Fortress" protocol we use to calculate the perfect size for every single trade. We know that position sizing is the only variable in the market you can control with 100% certainty. While others chase high win rates, we focus on mathematical longevity to ensure that even a string of losses cannot end your trading career.
Amateur traders focus on how much money they can make. Professional traders focus on how much they can lose. Position sizing is the only variable in trading that is 100% under your control. You cannot control where the stock goes, but you can control exactly how much it hurts if it goes against you.
Phase 1: The Golden Rule – The 1% Risk Model
The industry standard for professional survival is the "1% Rule."
The Law: Never risk more than 1% of your total account equity on a single trade idea.
Note: "Risking 1%" does NOT mean buying 1% of your account in shares. It means if the trade hits your stop loss, you lose only 1% of your total account balance.
Example:
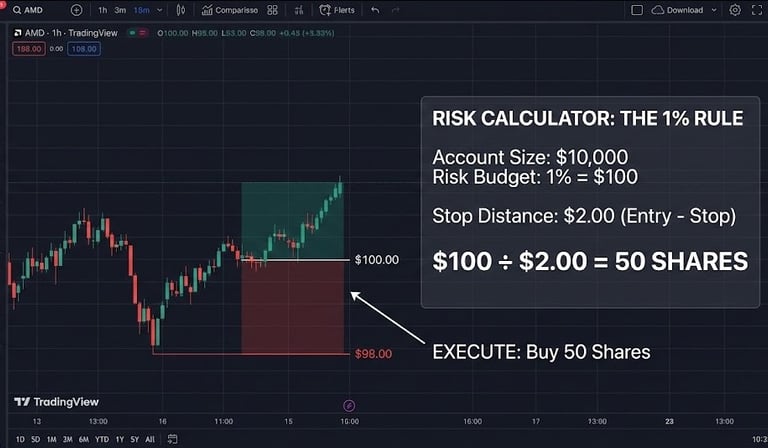
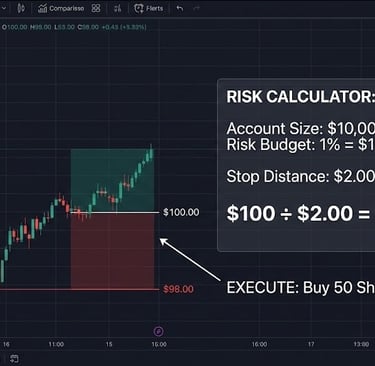
- Account Balance: $10,000
- Max Allowable Loss (1%): $100
This means you can take 100 consecutive losses before your account hits zero. In the landscape of 2026 volatility, this mathematical buffer is what keeps you alive during a drawdown. If you have a high-conviction setup, you might scale to 1.5% or 2%, but for the vast majority of your career, 1% is the anchor that prevents emotional decision-making.
Phase 2: The Calculation Formula
Stop guessing your share size based on a "feeling." Use this formula before you enter every order.
Formula: (Account Risk Dollar Amount) ÷ (Entry Price - Stop Loss Price) = Shares to Buy
Real-World Example:
* Scenario: You want to buy NVDA at $450.
* Technical Stop: Your chart says the support level is at $445.
* Stop Distance: $5.00 per share risk.
* Your Risk Budget: You have a $20,000 account. Your 1% risk is $200.
* The Math: $200 (Risk) ÷ $5.00 (Stop Distance) = 40 Shares.
Result: You buy 40 shares. If NVDA drops to $445, you lose exactly $200. You live to trade another day. This formula is especially critical when trading high-liquidity assets found in our [SPY Intraday Playbook], where speed and precision are paramount.
Phase 3: The "Volatility Adjustment" (ATR Sizing)
Not all stocks are created equal. A boring utility stock moves differently than a high-growth tech stock. You must adjust your size based on volatility. We use the ATR (Average True Range) indicator to define the "noise" of a stock.
* High Volatility Stocks (High ATR): The stop loss must be wider to avoid being "stopped out" by normal daily fluctuations. Therefore, your share size must be SMALLER.
* Low Volatility Stocks (Low ATR): The stop loss can be tighter. Therefore, your share size can be LARGER.
During periods of extreme market turbulence, we also cross-reference our [VIX fear index] protocol to determine if broader market panic requires us to reduce our risk even further—perhaps down to 0.5% per trade—until the environment stabilizes.
Phase 4: The Danger of Fixed Share Sizing
Most beginners say, "I always buy 100 shares." This is one of the fastest ways to lose an account.
- 100 shares of a $5 stock = $500 total exposure.
- 100 shares of a $500 stock = $50,000 total exposure.
Buying fixed shares means your risk fluctuates wildly from trade to trade based on the price of the stock rather than the quality of the setup. Consistently profitable traders use "Fixed Risk" (the 1% rule), not "Fixed Shares." This ensures that every win and every loss is standardized, allowing your "edge" to play out over a large sample of trades.
Phase 5: Correlated Risk – The Silent Account Killer
Even if you risk 1% per trade, you can still blow up if your trades are correlated. If you buy 1% risk in AAPL, 1% in MSFT, and 1% in NVDA, you aren't in three different trades. You are in one 3% risk trade on the "Tech Sector." If a sector-wide news event hits, all three will drop together.
The Smart Trades Rule: Limit your "Total Heat" (total open risk) to 5-6% of your account at any one time, and never more than 2% in any single sector.
Phase 6: Scaling Into Winning Positions (Pyramiding)
The most successful traders in history don't put their full 1% on at once. They use "Scaling."
1. Initial Entry: Put on 0.5% risk.
2. Confirmation: If the stock moves in your favor and breaks the next resistance level, move your stop to breakeven and add another 0.5% risk.
This technique allows you to have a large position in a winning trade while keeping your "Total Risk" at the original 1% or less. This is the hallmark of professional capital management.
Phase 7: The Kelly Criterion (For Advanced Traders)
Once you have a proven track record (over 500 documented trades), you can use the Kelly Criterion to optimize growth. This mathematical formula suggests betting more when your "win rate" and "reward-to-risk ratio" are higher. However, "Full Kelly" is extremely volatile and can lead to massive drawdowns. We recommend "Half Kelly" for aggressive growth, allowing you to maximize gains without the stomach-churning volatility.
Warning: Do not attempt Kelly sizing until you have 6 months of profitable data. Stick to the 1% rule until then.
Phase 8: The "Sleep Test" and Psychology
The ultimate test of your position size is the "Sleep Test." If you carry a position overnight and you wake up at 3:00 AM to check the futures market or international exchanges, your position is too big.
Trading should be boring. The math should be automatic. When you standardize your risk to 1% per trade, you remove the fear of "being wrong" because you know exactly what it costs. This mechanical approach is the foundation for [overcoming fear and greed], allowing you to execute with cold discipline regardless of market noise.
Summary: The Math of Longevity
Position sizing is the bridge between a gambler and a professional. By adopting the 1% Fortress Protocol, you stop viewing trades as individual events and start viewing them as a series of probabilities. You protect your capital during the inevitable "drawdown" periods so that you are still in the game when the "easy money" trends return. Calculate the risk, set the stop, and trust the math.